Lesson 2: Make a service accessible over the Internet
In this lesson, you’ll learn how to allow a single service to be accessed from outside your local network.
You’ll configure a server named “myserver.example.com” to accept Messages service connections from Mac clients, allowing them to chat with other Messages service users.
Along the way, you’ll learn about:
Port forwarding
Public and private IP addresses
Domain names, host names, and fully-qualified domain names
Domain name service (DNS), both static and dynamic
If you completed Lesson 1 of this tutorial, you can skip to step 3.
Step 1. Get a public, static IP address
Your server needs an IP address that the public Internet can count on as the location of your web server. A static IP address is assigned to you from your ISP.
-
If you’re part of a large organization, consult with the person who controls the addressing, the router, gateway, or firewall that connects your network to your ISP.
The IP address is used by the domain name system to establish a link between the human-readable domain name and the machine-readable IP address.
Step 2. Get your host name and fully-qualified domain name.
Here’s some important Internet naming terminology you need to know:
-
The Domain Name System (DNS) is the way the Internet links machine-readable static IP addresses to human-readable domain names.
Dynamic DNS is a way to use human-readable naming with IP addresses that change regularly and are periodically reassigned. If you didn’t get a public, static IP address, you’ll have to use Dynamic DNS rather than normal DNS.
The host name is the name your server is known by on your local network. For example, you could name your server “myserver” or whatever else would uniquely identify it on your network.
The domain name is the name that designates a large organization rather than an individual member. For example, Apple’s domain name is “apple.com.” Documentation about Internet services sometimes uses “example.com” as a domain name. Domain names are leased from a Domain Name Registrar (a company that keeps track of domain names and makes sure they are unique).
A fully-qualified domain name includes the host name and the complete domain name.
A DNS provider keeps a record of the domain name and the fully-qualified domain name, and the static IP address they are associated with.
-
If you’re on your own for this lesson, you need a domain name and a host name. You can pick out your own host name, but you need to lease a domain name.
If you’re part of an existing organization, there’s a good chance you already have a domain name (like example.com) and some system for picking host names. Your organization should also have a DNS host to link your static IP address and domain name to each other.
For this lesson, you’ll see the following placeholder names:
Setting
Placeholder name
Domain name
example.com
Hostname
www
Fully-qualified domain name
www.example.com
WARNING: Don’t enter the placeholder settings in this tutorial. The name “example.com” is reserved for use in documents like this, and won’t work in real software configurations. Use your own settings.
Step 3. Configure Messages service
-
The only thing you need to do is turn on Messages service. In the Server app, select Messages, then turn on the service.

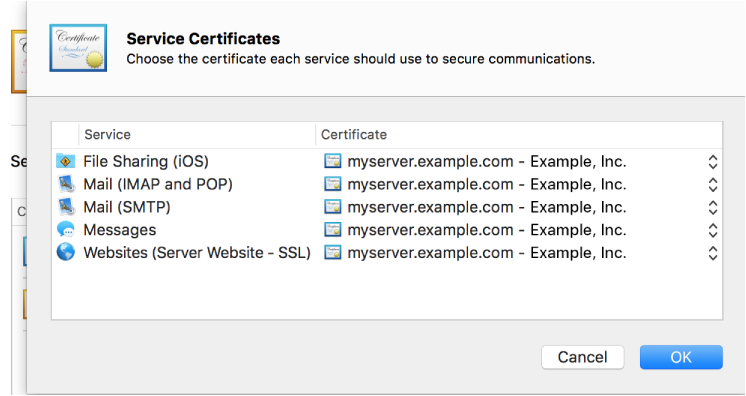
Make sure SSL is enabled for the Messages service in the Certificates section of the Server app.
If you’re using an AirPort Base Station that’s configured using Server app, you can choose to allow Internet access to Messages service automatically.
If you’re administering an AirPort Base Station using Server app, you’ll see the base station in the list on the left.

After you turn on a service, the Server app gives you the chance to automatically configure the AirPort Base Station gateway settings to allow Internet access to it by clicking a single button. If this is your situation, click Allow, and you’re done! Skip to step 5 to test the configuration.

Step 4. Open the necessary Internet ports at the gateway
-
If you’re part of an organization, there’s probably a firewall that needs to be adjusted to let VPN connections through. Similarly, if you’re setting this up using an Internet router or Wi-Fi access point, you’ll need to set port forwarding.
Firewalls and NAT routers (gateways) block unwanted external connection attempts, and need to be explicitly told to allow unsolicited external connections. These connections (called “ports”) are numbered. Think of these ports as tunnels or holes in a wall that connect the outside to a specific place inside, handled by the service.
Open or forward the following ports for Messages service:
Port
Type
For use with
5223
TCP
Messages SSL service
7777
TCP
Messages file transfer
Step 5. Test your configuration
-
Add a Messages account to the Internet Accounts pane of the System Preferences.

Enter values for the following settings, then click Create:
Setting
Value
Account type
Jabber
User name
user@fully-qualified domain name(like username@myserver.example.com)
Password
The user’s password
Use SSL
selected
Other options
Leave as default

Congratulations!
You’ve learned how to make your services available to users on the Internet!
Where to go from here
You can find out more about using OS X Server’s services in Server Help.